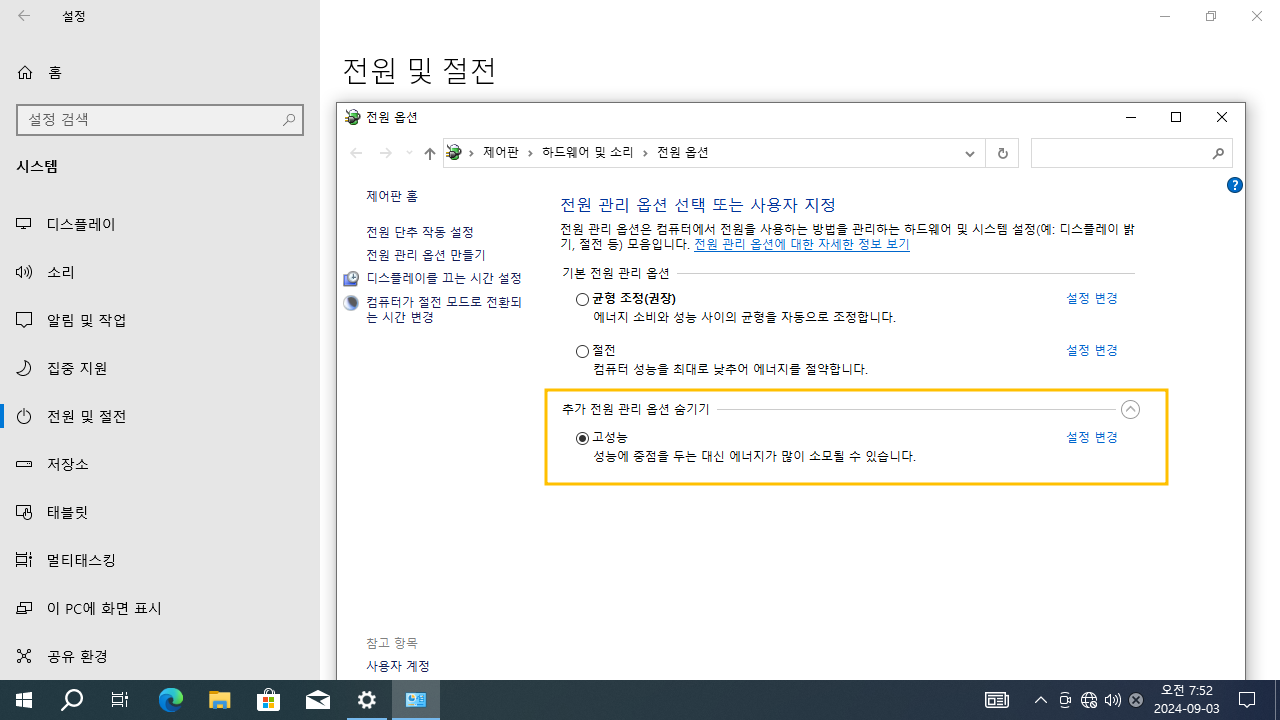
Windows 10 Power Preferred plans
Start > Windows Settings > System > Power & sleep > Additional power settingsControl Panel > All Control Panel Items > Power Options > Choose or customize a power plan
윈도우10 기본 전원 관리 옵션
시작 > Windows 설정 > 시스템 > 전원 및 절전 > 추가 전원 설정제어판 > 하드웨어 및 소리 > 전원 옵션 > 전원 관리 옵션 선택 또는 사용자 지정
영상보기 : https://youtu.be/GwbruwVt8Js
이 명령어들은 Windows의 powercfg.exe 도구를 사용하여 시스템의 전원 관리 프로필(전원 계획)을 설정하고, 현재 시스템에 있는 전원 계획들을 나열하는 데 사용됩니다. powercfg.exe -SETACTIVE 명령어는 지정된 전원 계획(여기서는 "고성능","최고성능" 계획)을 활성화하여 시스템이 해당 설정을 따르도록 합니다.
powercfg.exe /L 이 명령어는 현재 시스템에 존재하는 모든 전원 계획의 목록을 표시합니다. /L: 이 옵션은 현재 시스템에 설정된 모든 전원 계획을 나열합니다. 각 전원 계획은 이름과 함께 고유 식별자(GUID)로 표시되며, 현재 활성화된 전원 계획은 별도로 표시됩니다. 이 명령어를 실행하면, 현재 시스템에서 사용할 수 있는 모든 전원 계획의 목록이 표시되며, 현재 활성화된 전원 계획이 무엇인지 확인할 수 있습니다.
www.youtube.com/@XTRM
소프트엑스 XTRM
SOFTware unknown X of XTRM 컴퓨터 유지보수 기술 공유 채널입니다.
출처: https://xtrm.tistory.com/420 [XTRM MEDIA SERVER:티스토리]
※ 티스토리 페이지 비밀번호는 유튜브 영상 "...더보기" 설명란에 있습니다.
Windows 10에서 사용자 지정 전원 계획을 만드는 방법
전원 계획은 컴퓨터가 전원을 사용하고 절약하는 방법을 관리하는 하드웨어 및 시스템 설정의 모음입니다.전원 계획은 전원 구성표라고도 합니다.특정 컴퓨터에 최적화된 사용자 지정 전원 계획을 만들 수 있습니다.
기본적으로 Windows 10에는 균형 조정 , 절전 및 고성능의 세 가지 기본 제공 전원 계획이 포함되어 있습니다 .시스템에 맞게 이러한 기존 계획을 사용자 지정 하거나 기존 계획을 기반으로 하는 새 계획을 만들거나 처음부터 새 전원 계획을 만들 수 있습니다. 이 자습서에서는 Windows 10 PC 의 모든 사용자가 사용할 수 있는 새 사용자 지정 전원 계획을 만드는 방법을 보여줍니다.
컴퓨터가 Modern Standby를 지원하는 경우 기본적으로 Balanced 전원 관리 옵션 만 사용할 수 있습니다 .
옵션 1: 전원 옵션에서 사용자 지정 전원 계획을 만드는 방법
옵션 2: 명령 프롬프트에서 사용자 지정 전원 계획을 만드는 방법
OPTION ONE
To Create Custom Power Plan in Power Options
1 Do step 2, step 3, or step 4 below for how you would like to open Power Options.
2 Right click or press and hold on the Power icon in the notification area, click/tap on Power options, and go to step 5 below.
3 Open the Control Panel (icons view), click/tap on the Power Options icon, and go to step 5 below.
4 Open the Win+X Quick Link menu, click/tap on Power Options, click/tap on the Additional power settings link, and go to step 5 below.
5 Click/tap on the Create a power plan link on the left side.
6 Select (dot) an existing power plan to base the new custom plan on, type in a plan name you want, and click/tap on Next.
7 Click/tap on Create.
8 Your new custom power plan is now your current active plan. Click/tap on Change plan settings to make any changes you want to the new custom power plan.
OPTION TWO
To Create Custom Power Plan in Command Prompt
1 Open a command prompt.
2 Copy and paste the powercfg /list command into the command prompt, and press Enter. This will give you a list of all existing power plans on the PC along with their GUID. Make note of the GUID of the power plan (ex: high performance) you want to base the new custom plan on.
3 Type the command below into the command prompt, and press Enter to create a new custom power plan.
powercfg -duplicatescheme GUID
Substitute GUID in the command above with the actual GUID you chose from step 2 above.
For example: powercfg -duplicatescheme 8c5e7fda-e8bf-4a96-9a85-a6e23a8c635c
4 Make note of the given GUID (ex: 48569655-ebee-4428-b456-512f207cddc2) for the new custom power plan. (see screenshot above)
5 Type the command below into the command prompt, and press Enter to rename the custom power plan to what you want.
powercfg -changename GUID "name"
Substitute GUID in the command above with the actual GUID given for the custom power plan in step 4 above.
Substitute name in the command above with the name you want for the custom power plan.
For example: powercfg -changename 48569655-ebee-4428-b456-512f207cddc2 "My Custom Plan 1"
6 Type the command below into the command prompt, and press Enter to make this new custom power plan your active plan.
powercfg -setactive GUID
Substitute GUID in the command above with the actual GUID given for the custom power plan in step 4 above.
For example: powercfg -setactive 48569655-ebee-4428-b456-512f207cddc2
7 When finished, you can close the command prompt if you like.
8 You can now change the settings of the custom power plan to what you want.
자료 출처 : https://www.tenforums.com

 윈도우10 디스플레이를 끄는 시간 설정 | Windows 10 Settings - ...
 윈도우10 전원 단추 작동 설정 - 종료 설정 메뉴 표시 | Windows ...


